Friday, December 14, 2012

STAMPIN' UP'S CLEARANCE RACK IS HERE


Stampin' Up! have temporarily taken some products out of retirement with discounts up to *70% off* retail - only while supplies last! There will be different products on sale each week, for the next 4 weeks. This week there are Christmas stamps, cardstock, inkpads and markers, as well as ribbon, patterned paper...and even a punch...all at bargain prices! So if you missed out on any of these items in the last catalogue, or if you just love a bargain, check out the list HERE (you'll need a copy of last year's catalogue for the page numbers). But get in quick. At these prices, they are not lasting long.

Tina

Monday, November 19, 2012

Queensland's Heartfelt Stampin' Up! Event

Hi everyone, well where have I been for the past few months.  Not far but totally busy with life and the kids and the hubby and you name it.  I'm so sorry for all my followers that I've taken so long to post.

On the weekend it was our turn for Queensland to have it's Stampin' Up! Heartfelt Event and wasn't it a  wonderful day jammed pack with displays, information, demonstrations and Products to see and play with.

This year I was on Product Playground helping with the Stamping Table.  I made a couple of things for the display boards one being a Christmas Wall hanging using the framelits and the gorgeous Stamp Set called Watercolour Winter.  I just love this set.   You may recognise that this is similar to one I made last year.


We also had to make something using the hostess set called "Christmas Wishes".   This is not a set I would normally choose to buy but I gave it a go and came up with these for the display.   Two little gift cards which have lots of paper piecing, multiple stamped images in different colours that I have cut out and pieced together to get a colourful image.


Here is my Santa Place Card for the Christmas Table.  My eldest son saw this and said is that what we are having for Christmas this year?   I guess now I'll have to make one for everyone at the table so as not to disappoint him.

Here is a card I made called an "Easel".   So simple to make yet very effective for a "Special Card" for a special person.  Again using Winter Watercolour along with the Holiday Ornaments and the wonderful new Coredinations Cardstock.


Here's a peek at the inside.

And lastly a "Joy Fold Card" to finish off the display.   I used the Winter Watercolour poinsettia image to make these flowers.  Stamping them three times and cutting out layers omitting the background leaves each time and then joining them together with a Vintage Brad.


I had such a wonderful time at the Heartfelt Event and look forward to convention now next year which is going to be held in the same place, Brisbane.

I promise I won't keep it this long between posts again.

Happy Christmas Stamping everyone.

Tina

Sunday, September 2, 2012

The 2012/13 Annual Catalogue and Holiday Catalogue have arrived

This is the best catalogue ever and it is jammed pack full of brand new products, stamp sets, ribbon, ink pads, colours, punches, framelits, dies.

And the new Holiday Catalogue is the first Mini totally devoted to Christmas, Halloween and Thanksgiving (although not celebrated so much here in Australia, the papers and embellishments are still very nice).

I have received a few bits and pieces from my pre-orders which is only available to demonstrators.  But now you can all jump in and order your favourite products.

I've had a bit of a play and came up with some cute little Halloween items, a few cards and some Christmas ideas.  My big order should arrive this week (fingers crossed) when I can get stuck into the really good stuff.


Here is a look at some of the things I've made so far.

Here we have Cordinations Cardstock that has a different coloured core so that when you emboss it and sand it back it reveals a different colour.  Comes in Early Espresso, Cherry Cobbler and the new Gumball Green.  We also have a new Framelits Dies called "Window Frames Collection" as well as cotton ribbon tape that you can stamp on.


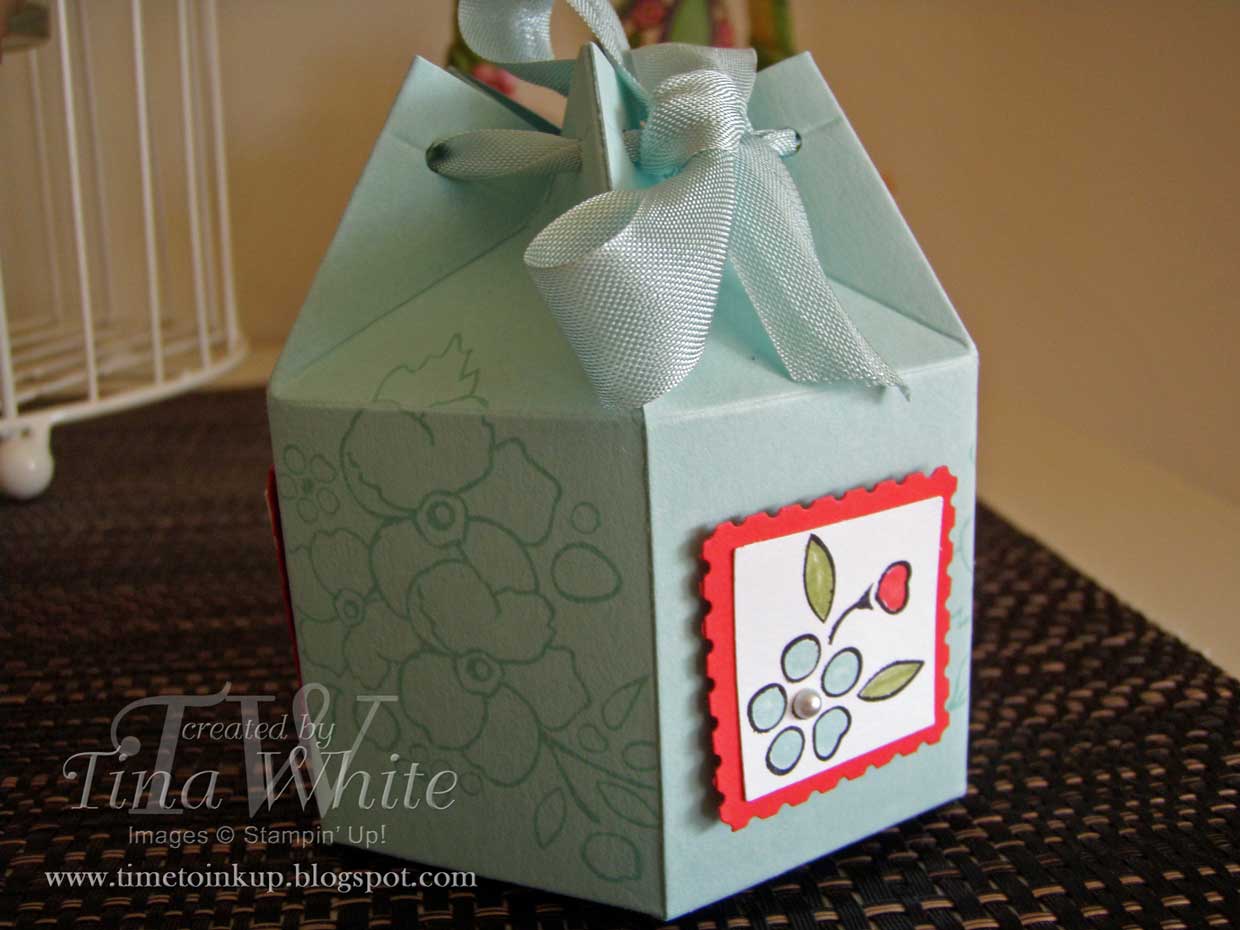
This is the new stamp set called Betsy's Blossoms.  I know I'm going to be using this set a fair bit as it is so versatile.  Here with have the new colour Primrose Petals along with Basic Grey and Black.  

This little fellow is out of the new Haloween set called "Googly Gouls"  you can get a Bundle called Ghoulish Googlies which has the stamp set, Glassine Bags, Googly Eyes, Double sided Tags and Pumpkin Pie Baker's Twine to make these cute little bags for treats.  These were lots of fun to make but I'm not sure if I could see myself making lots of them.


So this is just a little sample of what's to come over the next few months.  Keep an eye out for more exciting new projects from me. 

Tina


Wednesday, August 1, 2012

The Retirement List is Here


It's that time again folks.  Retirement List from Stampin' Up!   Please contact me ASAP so you don't miss out because when the products are gone, they are gone forever.

For the Stamps Retirement List click here
For the Accessories click here


Monday, July 30, 2012

Sympathy Card


On the weekend I had an absolutely wonderful time meeting some lovely new ladies in Kingaroy for an all day workshop.  We could have gone on all weekend I'm sure but we had to call an end to it sometime.   One of the requests was for some ideas for sympathy cards.  It was a challenge for me as I have not made one before but I put my thinking cap on and came up with this lovely card which we all made on Saturday.

Very basic and not very long to make but I think it does the job beautifully.


I used Clear Block "C" stamped in Wild Wisteria to add a block of colour to the Very Vanilla card stock then stamped the image from Pocket Silhouettes in Elegant Eggplant over the top.  Wrapped some Wisteria Bakers' Twine around the image and mount it up on some Wisteria Cardstock.

I'll post some more projects we made this weekend on here soon.

Tina 

Tuesday, July 17, 2012

Tea Shoppe Caddy

 In my last class we girls made this lovely little Tea Caddy along with some other items perfect for gift giving based on the Tea and Coffee Theme.  We used two Stampin' Up! stamp sets, "Tea Shoppe" and "Morning Cup".   This was not my original idea.  I googled Tea Caddy and up came lots of wonderful ideas to get the brain sells pumping.

This is my version of the Tea Caddy using "Tea Shoppe" and the Designer Series Paper called "Attic Boutique".  The Twinings Tea Bags fit perfectly into the box and I was lucky to pick a flavour who's colour matched perfectly.

I've also used the Edgelits and matching embossing folders.  My favourite pink "Blushing Bride" was also used.  I'll be sad when this leaves us in August.


We also made a Coffee Pouch which  I received as a swap from convention.  I put a different front on the pouch and double embossed it by running it through the embossing folder and then brayering Versamark on the top and heat embossing it with Gold embossing powder.  Inside you could put a coffee sachet or bag with a chocolate for some yumminess.


The last item we made was this Tea For Two pouch which is made from one piece of Designer Series Paper folded up to make this double sided pouch.  A tea bag can fit in both sides with a couple of biscuits held in the middle.  I found this little template from HERE.  It is very easy to follow.
I think it makes a lovely gift and is a good way to use up all your old DSP......

The one thing that I would most definitely recommend to make all these projects was the Simply Scored Tool.  It made measuring and scoring a breeze and really is a tool you should invest in.


Hope you enjoyed these.  The girls had a lot of fun making them.  Needless to say we were working very late into the night.

See you again soon.

Tina

Wednesday, July 11, 2012

Tea Shoppe Loveliness

I have put off buying this set for some time because I just couldn't think what to do with the Big Tea Cup.  Finally I gave in because I wanted the set for the other stamps to help me with my next class.  So my mum has had a bit of a play with this one and come up with a card to give to her friend who took her out for a cuppa a week or so ago.


This is what I love about Stampin' Up!  They have all these different products that colour co-ordinate perfectly.  Here we've used Rose Red Ink Pad, Rose Red Seam Binding, Very Vanilla Cardstock and the lace trim which all works brilliantly together.


Mum added a few pearls, a Vintage Brad and some distressing to finish off the cards.   I'm sure her friend will be thrilled.

Happy Stamping Everyone

Tina

Wednesday, June 27, 2012

My first ever Class by Mail


A lot of you know I run classes from my home and I know there are a few of you out there that would love to come but live too far away or just don’t have the opportunity to get to a class so I am offering my first ever Class by Mail using the very new and very cute stamp set “Bright Blossoms”.


This set would be perfect for any creative girls party activity and with three sets of 4 gift cards enclosed already, I can easily put more materials in depending on the numbers for a small extra fee.

Of course it makes a lovely little gift of blank cards together with it's own box for someone special.


If you would like to order the class simply check out my Class by Mail Page by clicking on the tab at the top of my blog and all the details are there for you.

I look forward to getting this Class out to you.  I had lots of fun putting it together.

Tina


Saturday, June 23, 2012

Paper Rosettes

My latest class was making lovely Paper Rosettes (or Lollies) and today I have for one of the cards we made.  All the ladies were very happy with their creations and thoroughly enjoyed themselves (we always do).


As you can see we had a play with the new Diagonal Plate that is available to everyone on July 1.  It fits perfectly on top of the Stampin' Up's Simply Scored Tool and makes scoring diagonal lines and custom made envelopes a breeze.

Throw in a few other little embellishments and you get this fabulous little card that is sure to make anyone feel good who receives it.


I loved making the little Icecream Cone.  Just by using the Petite Pennants Punch and the Cupcake Punch.  Isn't the tiny cherry just so cute.

If you would like to purchase these two punches or any other products required to make this card for yourself, just drop me an email or a call and I can order them straight away and have them shipped to you before you know it.  If you order this month and spend $125 you will receive this set  "Reason to Smile" free from Stampin Up in your choice of Wood or Clear Mount.

If you would like to make this card yourself, just visit my website here and you can see my step by step instructions in the projects section.  Keep visiting there regularly to see more cards and projects in the coming months.

Happy creating everyone

Tina

Thursday, June 21, 2012

Angry Birds Fun


Today my youngest son, Christopher, was invited to his first Prep Birthday Afternoon Tea Party and the Birthday Boy just loves Angry Birds.  So today I spent a while making a card that I knew he would love.  My boys have an Angry Birds Board Game so I got out the box and studied the figures quite closely.


I got out an assortment of punches and cut some of the shapes out freehand.  The body was punched out with the 1 1/4" punch.  The eyes were cut out using the eye circles from the owl punch.  His belly was used with the same punch as the body just cutting it into an ark.  The dots were made from the small hole punch on the Crop-a-Dile.  They curled a little but I just flattened them out.  You need tweezes for these little suckers.

The clouds were cut from the icing top of the cupcake punch and the number 6 was cut from the letter Dies and i used Red Glitter Paper for a bit of glitz.    The Birthday sentiment was stamped in Stayzon and then I coloured in the word birthday using the Tempting Turquoise Marker.  I knew then that the colour would stay true since I stamped in on Tempting Turquoise to start with.

I was super happy with it and so was Denzell. 

Tina


Monday, June 18, 2012

The Open Sea

A little time ago I promised to post the card I made my John (my husband) for his birthday.  I love this set, The Open Sea, but this was the first time I had inked it up.


I have used some of the new Baker's Twine and to make it not so clean looking I ran my Espresso Ink dauber over the top to "grubby" it up.  The sentiment comes from the "Best Dad Ever" set which is great for men and it covers Fathers' Day, Birthday and Just Dad cards in general.  You can also see a little Mini Library Clip which I used to attached the sentiment to the card.

Sorry I was a bit late posting this but better late than never.

Tina
xx

Sunday, June 17, 2012

Convention 2012, Canberra Australia

Well I'm back and I have had the best time ever in Canberra with my fellow friends and demonstrators. Canberra was soooo cold but we were prepared for it.   We arrived on Wednesday and that night lined up for our Convention Bag and registration.  Don't I look fabulous.  I can tell you as the days went by I got tired and a little worse for wear.


Our convention Bag was sensational.  So many compartments, a place for your phone, all those stamp sets and even a pocket in the lid.  Loved the stitched flowers on the outside as well.  Very stylish.

We weren't there long when we got our group photo taken by the Stampin' Up roving photographer.  He was great and we were very enthusiastic.  You can see him in the reflection of the window.


Here we are from left to right, Bronwyn, Trish, Kim, Me, Genelle, Janette and Alice in front.

We had a great time learning new things, getting free goodies and of course catching up with Shelli and the US Staff as well as the Aussie girls too.

We had some wonderful displays of other demo's work to see as well as swaps and make and takes.  Lots of information about our upcoming catalogues and products too.  There are some good times ahead.


I'll be back next week with some pictures of my next class.  My creative juices are flowing.  See you again soon.


Monday, May 14, 2012

My Mother's Day

Hello and happy Mother's Day to everyone for yesterday.  I had a wonderful day which started with my Boys waking me up and giving me their presents they had bought by themselves from the Mother's day Stall at the school.  I got a lovely music box gift bag from Christopher and a flashing heart brooch, heart keyring and glittery paper rose from my older son Daniel.  Not to mention the handmade cards from both school and at home.

My biggest surprise was when my wonderful hubby presented me with this card.  Carefully handmade by himself in 5 minutes from the scraps left over from Friday Nights Punch Class.  He was so proud of it and so was I.  For those who know John you would agree that my husband doesn't have a crafty bone in his body and this was just the biggest surprise ever.  I  couldn't help having a bit of a laugh too when he said I would have put more embellishments on it if I could find some amongst all the rubbish that was on the table.  I will cherish this forever........


Then comes my youngest Son's card.  He is a minimalist wouldn't you agree.  I gave him bits and pieces to glue on here and there and this is what he came up with.  He again was so proud of it.   Aren't they funny things.


Now for the cards I made my mum and John's mum.  I made them both the same this year as I've been a bit short of time.  And I have cased them too which I don't do too often but I loved this one from Ruthy Clarke in Toowoomba and I just had to make it.  She doesn't have it on her blog but check out her blog anyway.  I  bought the punch and all just for this card.


I used to think the tiny pearls in the Pearl Pack were too small for anything but since getting the latest Stampin' Up! Mini Catalogue I have been using all the little pearls up on these gorgeous flowers from the Apothecary Set.  They are just the right size.


 The flowers are coloured in with my Aqua Painter using Regal Rose, Cherry Cobbler and Wild Wasabi.

I hope you all had a wonderful day yesterday and I'll be back later this week with the card I made for my Hubby's birthday.


Sunday, April 22, 2012

Bordering on Romance - Stampin' Write Markers Class Projects


Hi everyone.  Well this is the card we made at our last class a couple of weeks ago.  I have used the Bordering on Romance Stamp Set which is fast becoming my favourite set out of the Autumn/Winter Mini Catalogue.  The fact that I love to colour in makes it all the more appealing as it is so easy to colour these little flowers without making too much of a mess.

I have used the Stampin' Write Markers (Pool Party, Lucky Limeade and Poppy Parade) to colour these petals and leaves in.  When you use the thick end or   "brush end" of the pen you can get a nice coverage without being too streaky.

I've also used the new Framelits and Edgelits together with the matching embossing folders to pretty up the scalloped edge.


The next project was this gorgeous little box made from the Milk Carton Die.   I've tied the top with the new Pool Party Seam Binding.   I've also used the Postage Stamp Punch and the 1" Square Punch for the flower image.  A little pearl placed in the centre of the flowers just finishes it off.


Sunday, April 15, 2012

Apothecary Art and Matching Framelits


Today I have a quick card to show you made with the gorgeous new stamp set called Apothecary Art.  You will notice that it fits beautifully with the new Framelits from Stampin' Up!  There are lots of different sizes.  For this one I used the same size frame and cut it through the centre to give a small mat just across the top and bottom.  Just enough to add a bit of colour without too much.


I used the Stampin Write Markers to colour the flowers in, Calypso Coral and pretty in Pink with Old Olive for the leaves.   There's also a bit of Blushing Bride Pleated Satin Ribbon as well to finish it off.

Don't forget my Embellishment share which I've mentioned about last week in a previous post.  If you would like to take part of I have few spaces left.  Drop me an email if you would like to join in and receive lots of bits and pieces including this beautiful ribbon for not a lot of money.

See you next week with some more cards.

You might also like:

Related Posts Plugin for WordPress, Blogger...